How-To Guides
Outlook is the primary mail client for Microsoft 365. This article contains some useful guides on how to use some of its features.
Setting up an auto-reply
You can set up an auto-reply while you are out of the office, for example, to advise anyone who emails you that you’re on annual leave.
-
Click on FILE in the top-left corner
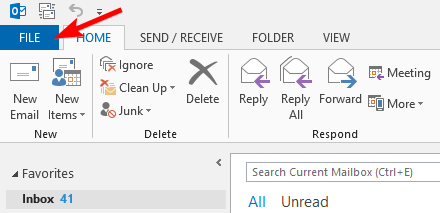
-
Click on Automatic Replies
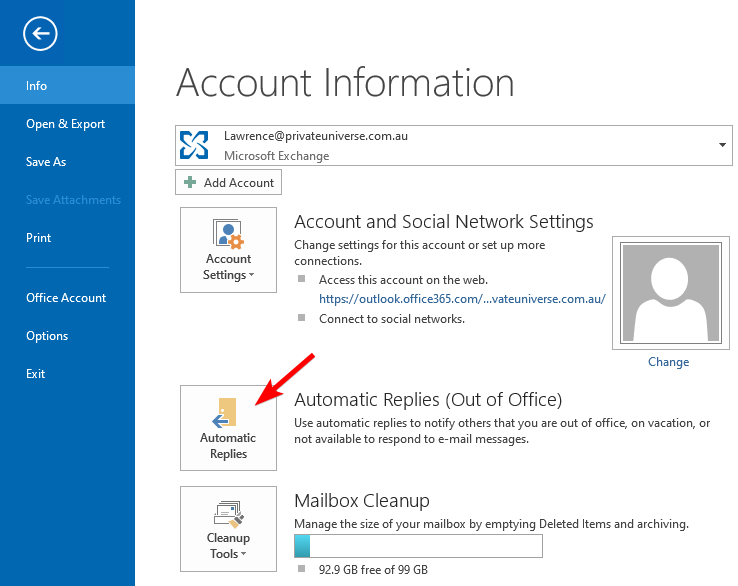
-
Select Send automatic replies
- Enable Only send during this time range if desired
- Enter your desired messages in the Inside My Organization and Outside My Organization tabs
-
Click OK to save changes
Accessing shared mailboxes
The methods for accessing shared mailboxes differ between each version of Outlook. Once we have confirmed that you have access to a shared mailbox, follow these steps to find your shared mailbox in your version of Outlook.
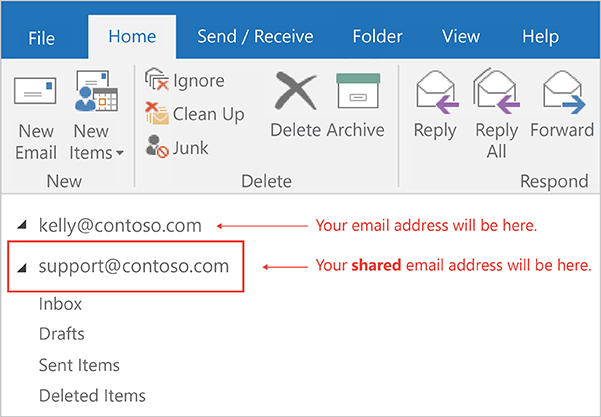
Outlook (classic)
In classic Outlook, you will see the shared mailbox in the left sidebar pane, below where your main inbox and mailbox folders are shown.
If the mailbox doesn't show up automatically or periodically disappears from the sidebar, you can follow these steps to manually add the mailbox to the classic Outlook client.
-
Along the top menu bar, click on "File", then "Account Settings", then "Account Settings" again in the dropdown menu.
-
In the "Account Settings" window, double-click on your email address, then click on "More Settings" in the bottom left of the new window.
-
Navigate to the "Advanced" tab, and use the "Add..." button to add a shared mailbox to classic Outlook. Type out the email address of the shared mailbox, then hit OK/Apply/Next to close any previous windows.
Outlook (new)
In the new version of the Outlook desktop app, you will find your shared mailboxes under the "Shared with me" subfolder in your own inbox.
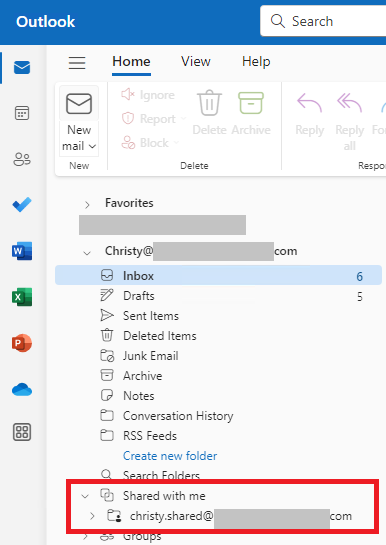
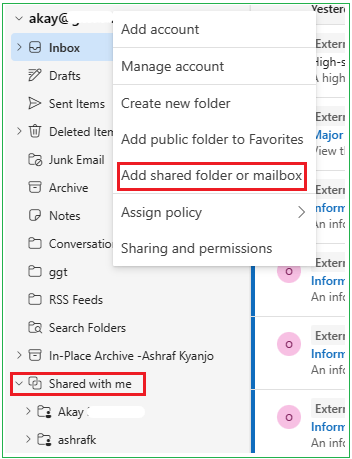
If the mailbox doesn't show up automatically, you can manually add the mailbox by right-clicking the "Shared with me" folder and selecting "Add shared folder of mailbox".
Outlook Web App (OWA)
In OWA (Outlook in your web browser), you can open a shared mailbox by selecting your profile in the top right and clicking on "Open another mailbox".
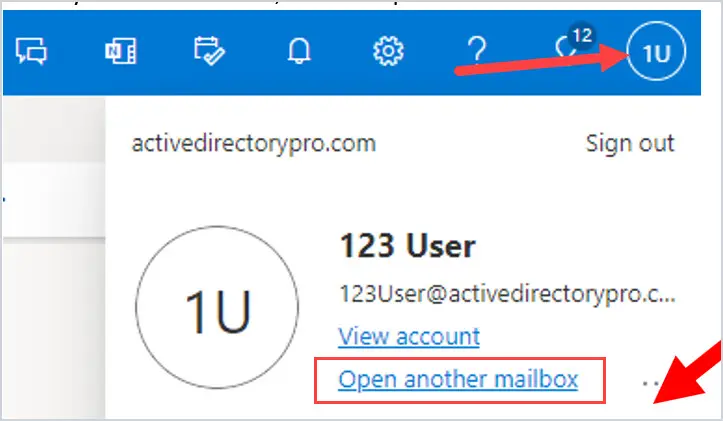
Alternatively, you can use the following link, replacing <EMAIL> with the email address of the shared mailbox.
Sharing calendars
By default, Office 365 will share your free/busy times in your Outlook calendar with your colleagues. When you create a new appointment, use the Scheduling Assistant to view their availability after adding them to the To line.
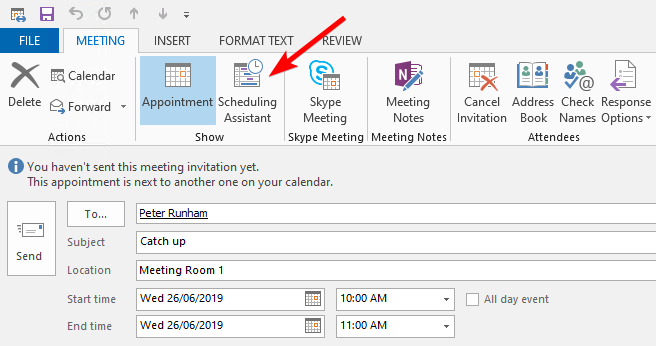
The Scheduling Assistant shows you the free/busy times of your colleagues.
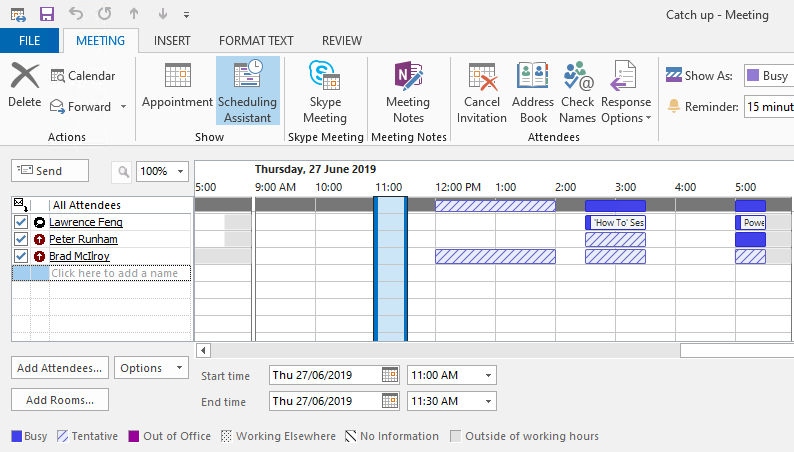
By default, your colleagues will only see the times that you are free or busy, not the details. If you want to share the full details of your calendar entries, you can do this in the Calendar view.
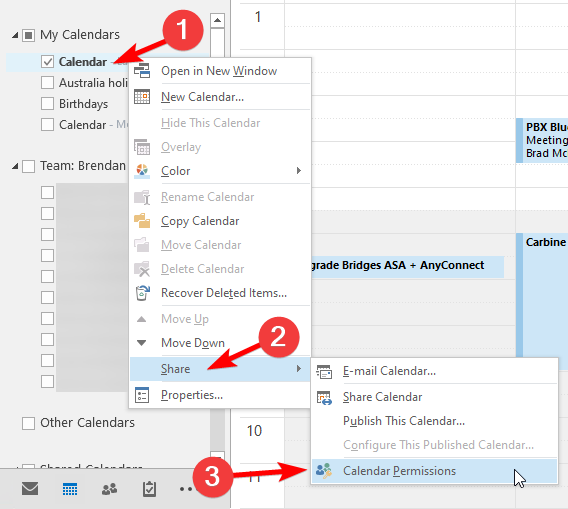
Under My Calendars, right-click on Calendar and navigate to Share ➡ Calendar Permissions.
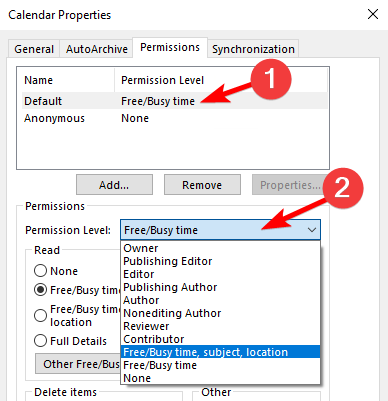
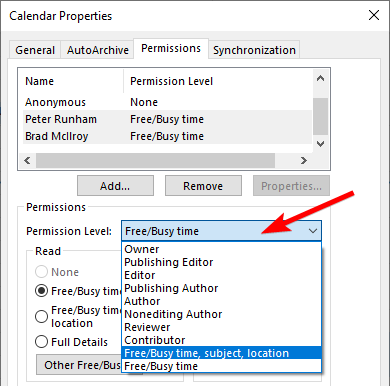
If you want to show full appointment details to everyone, click on Default, then select the appropriate Permission Level.
If you want to show full appointment details to only specific people:
-
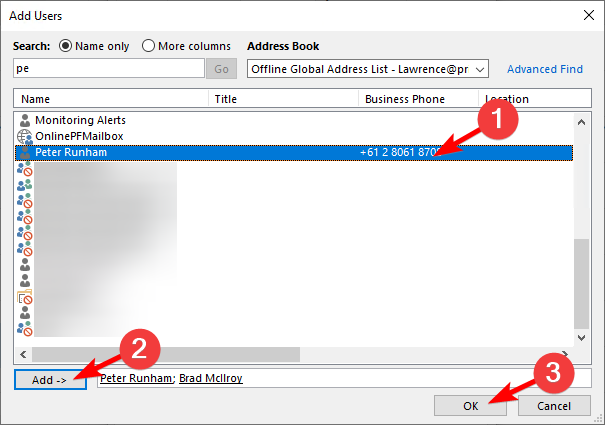
Click on Add

-
For each person you want to share with, search and select their name from the list and click Add ->, then click OK
-
Select the appropriate Permission Level
-
Click OK.
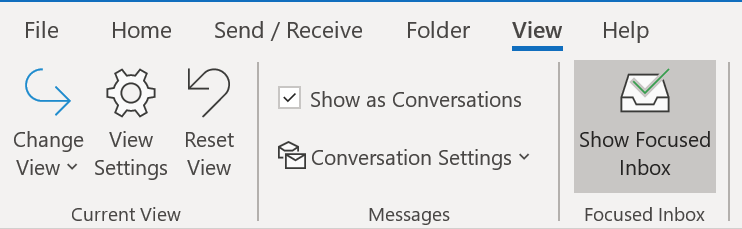
Disable focused inbox
The focused inbox tab is a feature which splits your email into two sections in an attempt to filter out less important emails.
To disable the focused inbox tab in Outlook, navigate to the View tab and uncheck Show Focused Inbox.